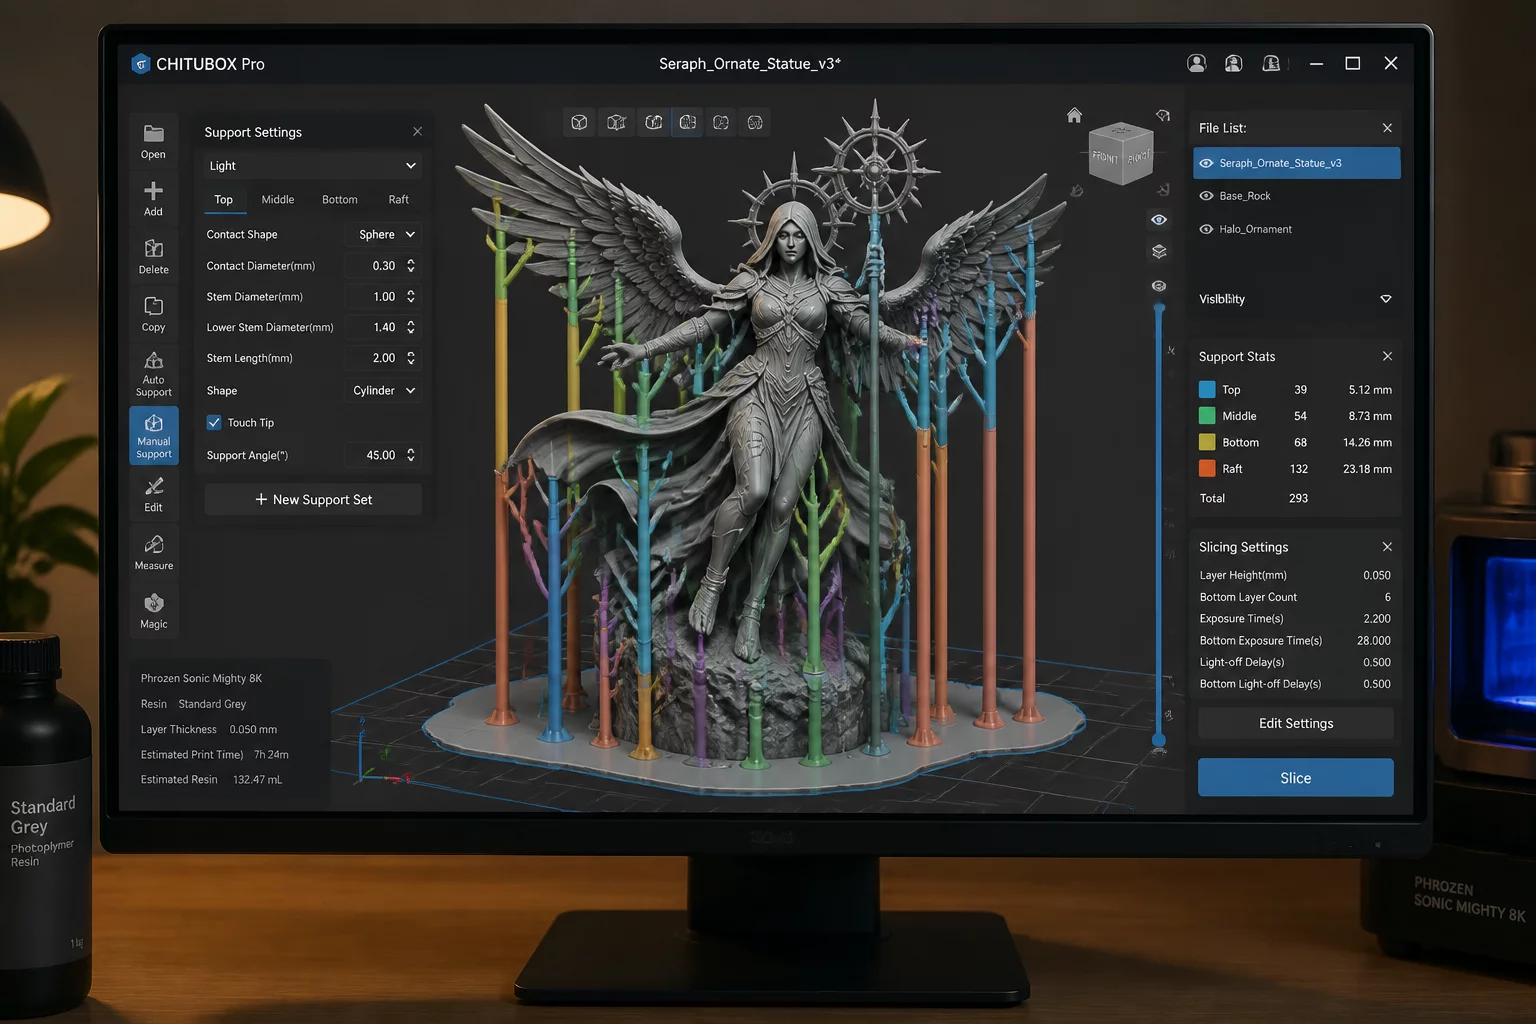
Understanding Peel Forces on Delicate Prints
When printing highly detailed or fragile geometries, the peel force exerted by the FEP or ACF release film is the primary cause of failure. As the build plate lifts after each layer exposure, the suction generated can easily distort or detach fine features. Standard automated support settings often apply contact points that are too large, leading to severe surface damage upon removal, or too sparse, resulting in print separation. Minimizing these forces requires a deliberate orientation and placement strategy.
Key Pillars of a Successful Support Network
To achieve dimensional accuracy without compromising surface finish, three essential principles must be followed:
- Optimized Part Orientation: Rotate the model (typically between 30 and 45 degrees) to reduce the surface area of each layer. This limits the suction force acting on the part during the lift cycle.
- Hybrid Support Sizing: Use robust, heavy supports for the main structural base of the model, and ultra-fine light supports (0.2mm contact points) for delicate details and floating overhangs.
- Cross-Bracing and Tree Structures: Interlink support columns to create a rigid scaffold. Single, isolated thin supports are prone to bending under peel force, leading to layer shifting or print failure.
Slicing Parameters and Fine-Tuning in CHITUBOX
For fragile geometries, the slicing settings are just as critical as the physical supports. Reducing the lift speed (e.g., from 60mm/min to 40mm/min) can drastically decrease peel stress. Additionally, configure the support contact shape to a sphere rather than a cone. The sphere penetrates the model slightly, ensuring a secure hold while allowing the support to snap off cleanly, leaving a raised bump that is easy to sand rather than a deep pit in your model.
Add Your Perspective