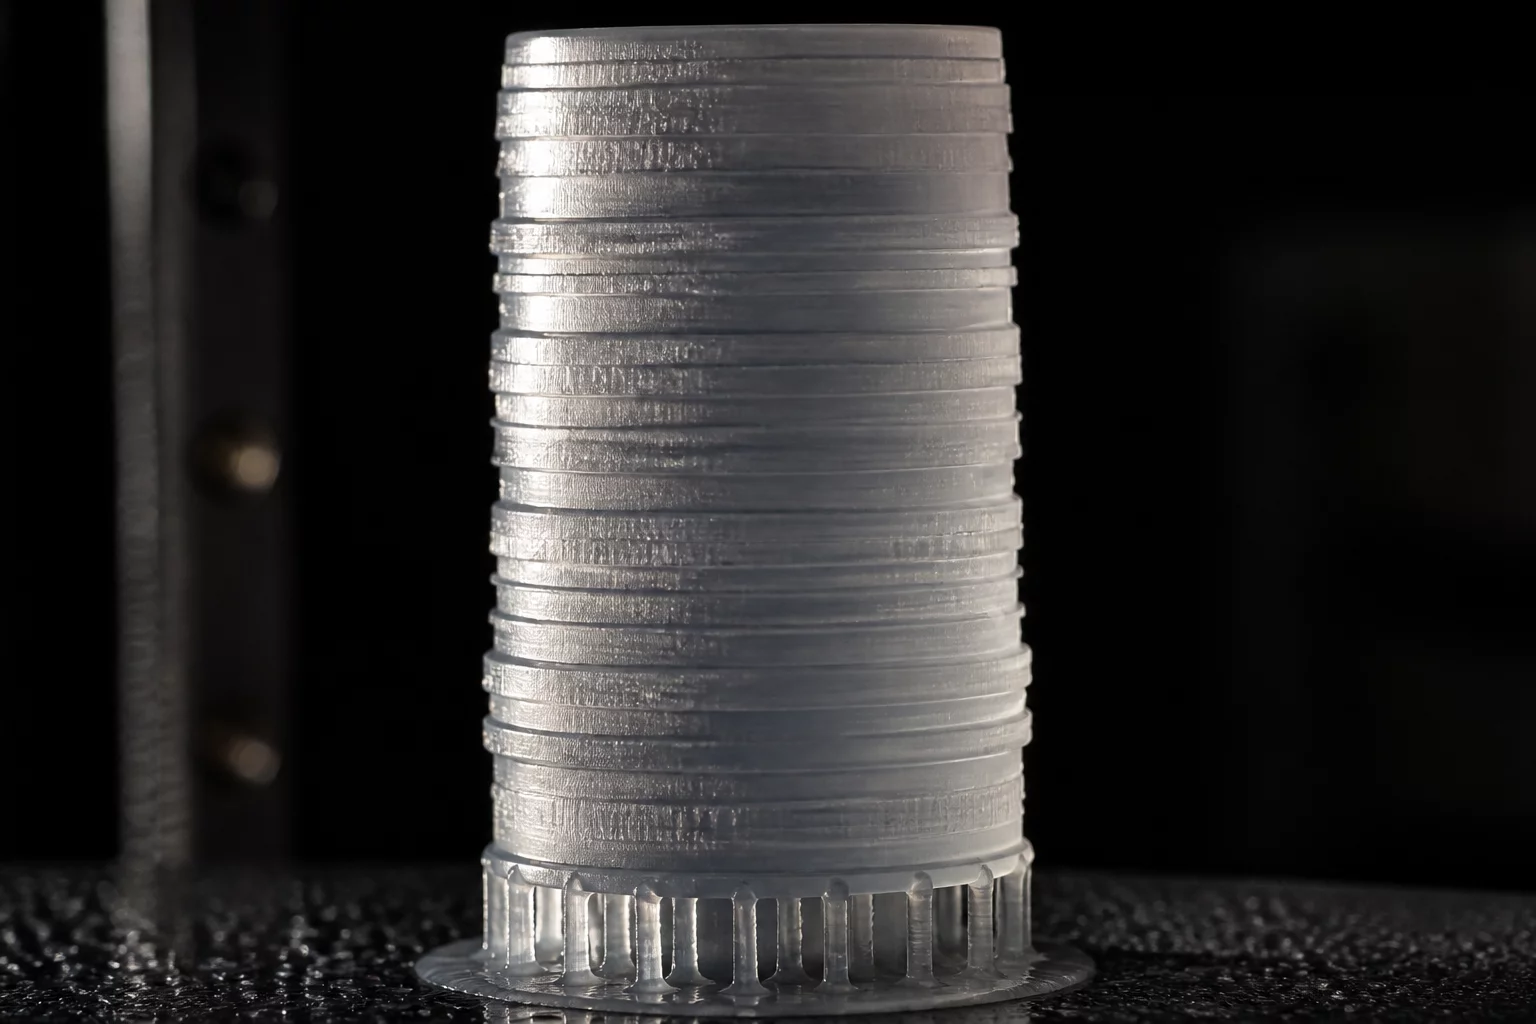
Understanding Z-Wobble in Resin 3D Printing
In high-precision photopolymer printing, Z-wobble manifests as periodic, recurring horizontal bands or ridges on the outer surface of printed models. Unlike random layer separation caused by temperature fluctuations or suction forces, Z-wobble exhibits a strict mathematical periodicity. This visual defect not only ruins the surface finish of delicate miniatures and engineering prototypes but also alters the dimensional accuracy of interlocking joints.
Primary Mechanical Causes of Z-Axis Instability
Z-wobble is purely a mechanical issue resulting from minor misalignments or wear in the motion transmission system. The most common contributors include:
- Bent Lead Screw: Even a microscopic bend in the lead screw translates rotational movement into lateral force, pushing the build plate slightly off-center at regular intervals.
- Loose Linear Rails: Linear guide carriages must restrain the Z-axis from moving sideways. If the guide rails are loose or carriage bearings are worn out, the plate will wobble.
- Misaligned Motor Coupler: A rigid coupler joining the stepper motor and lead screw transmits any motor shaft eccentricity directly to the print bed.
Practical Diagnostics and Solutions
To successfully eliminate horizontal banding, follow these structured troubleshooting procedures:
- Test the Lead Screw Straightness: Detach the lead screw and roll it across a perfectly flat glass surface. Any light passing under the screw indicates a warp that requires replacement.
- Tighten the Rail Carriage Mounts: Verify that the carriage screws holding the Z-axis arm to the linear rails are secure. Even half a turn of looseness can cause visible play.
- Upgrade to a Flexible Coupling: Replacing a rigid coupler with a flexible diaphragm or plum-jaw coupler absorbs small radial misalignments.
- Re-lubricate the Z-Axis: Clean the lead screw thoroughly with isopropyl alcohol and apply a high-quality PTFE-based grease to reduce friction-induced motor strain.
Frequently Asked Questions
How do I tell the difference between Z-wobble and suction banding?
Z-wobble is perfectly periodic, repeating every few millimeters corresponding to the lead screw pitch (typically 2mm or 8mm). Suction banding is irregular and occurs only at layers where the model cross-section changes abruptly, creating high pull forces.
Can firmware settings compensate for Z-wobble?
No. Because Z-wobble is caused by physical deflection of the mechanical assembly, software configurations or slicing settings like anti-aliasing cannot fix or hide these physical defects.
Add Your Perspective