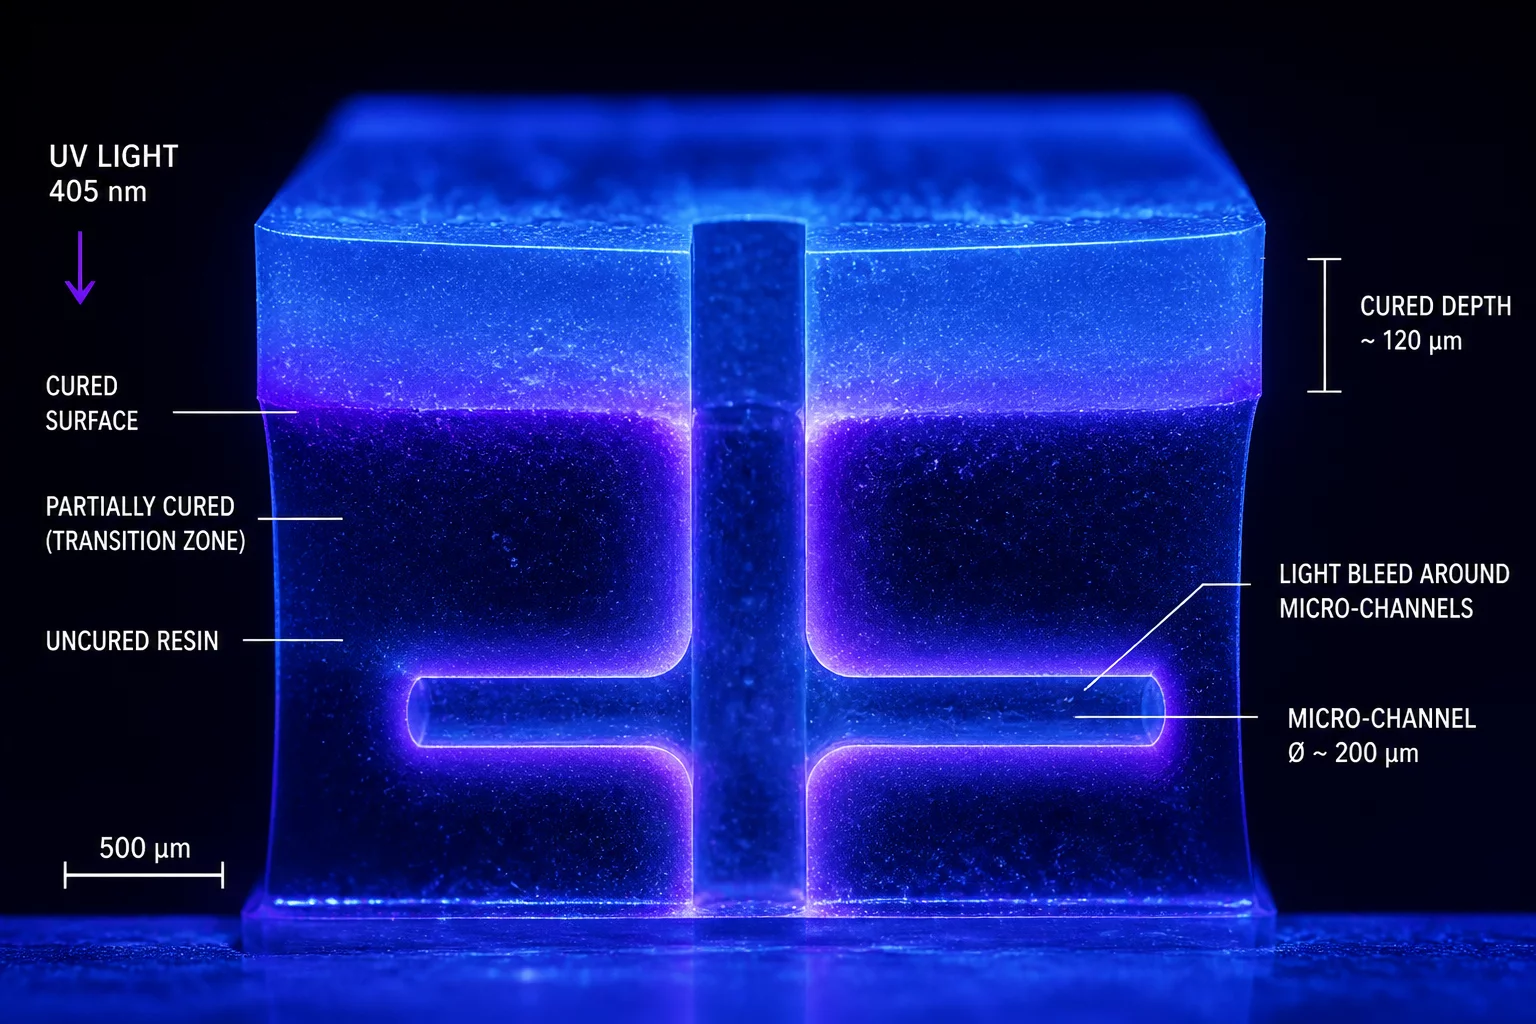
Understanding UV Light Dispersion and Bleed
In photopolymer 3D printing, achieving sharp micro-details requires strict control over how light interacts with liquid resin. Curing depth refers to the thickness of the resin layer solidified by UV exposure. Ideally, curing is restricted strictly to the defined layer height. However, as light passes through the photopolymer, it scatters horizontally and penetrates deeper than intended. This phenomenon, known as light bleed or parasitic curing, leads to resin solidifying in unwanted areas, typically filling in tiny cavities, micro-holes, and rounding sharp external corners.
The Mechanics of Over-Curing
When UV light hits the resin, photoinitiators absorb photons and trigger polymerization. If the light intensity is too high or the exposure time is too long, the reaction extends beyond the pixel boundaries. In transparent and semi-flexible resins, which lack heavy pigment concentrations to block or scatter light, this effect is amplified. The light continues to travel deep into the vat, creating an unwanted cure zone that reduces the dimensional accuracy of features like internal channels, threads, and delicate engravings.
Vertical Bleed (Z-Axis)
Occurs when light penetrates through the current layer and partially cures the resin above or below, resulting in fused holes and loss of vertical clearance.
Horizontal Bleed (XY-Axis)
Caused by lateral light scattering inside the liquid photopolymer, which rounds off sharp outer edges and fills in narrow slots.
Key Factors that Control Bleeding
Managing curing depth is a delicate balancing act. To achieve high repeatability and sharp features, you must consider the following variables:
- Exposure Duration: Even a fraction of a second of over-exposure can cause significant feature degradation on micro-scale parts.
- Pigment and Blocker Load: High-resolution resins contain specific light absorbers (yellow or red dyes) that limit UV penetration and confine the curing energy to a precise volume.
- Layer Thickness: Thinner layers require less exposure energy, which inherently reduces the potential for lateral light scattering.
Calibrating for Perfect Feature Fidelity
To prevent fine features from bleeding together, printing enthusiasts and engineers use specialized test prints like the AmeraLabs Town or Chess calibration models. By analyzing the print output, you can identify whether micro-holes are open and if thin vertical walls are standing independently. If features are merged, reducing the normal exposure time by 0.1 to 0.3 seconds often yields immediate improvements. Additionally, configuring slicing parameters like transition layer counts and light-off delay ensures the resin is settled and cool before the next UV cycle, minimizing thermal scattering effects.
Add Your Perspective